Installation guide
To install the Vormest formwork, you need:
rebar cutting tools, knife, tying hook and wire, measuring tape, marker and a few hours of time. When buying formwork, consider about 10-15% in reserve for connections and overlays.
- Mark the axes of the future building on the base of compacted crushed stone
- start the installation from the far corner
- install the full length molds first, then the missing pieces
- tie the joints
- put the lower edge of the film under the forms
- mark the height marks of the concrete casting on the inside of the form
- concrete to height marks
The formworks are for pouring concrete soles up to 250, 350, 450, 550 and 650 mm thick. In the case of a 250 mm concrete layer, the form sinks up to 30 mm wider from the top, which means an additional cost of concrete of 0.5 m³ per 100 meter sole. In the formwork, the concrete can be compacted with a vibrator. For concreting from 350 mm, the sides of the form must be connected with side ties, see drawing. When installing additional reinforcement, the reinforcement scheme of the project must be followed. If necessary, the construction film is placed under them before installing the sole forms. The adjacent drawings show solutions for making the most common connections. Step slopes, arches, extensions (for the chimney foundation, etc.) can also be made.
Installation guide
Nurgaühendus
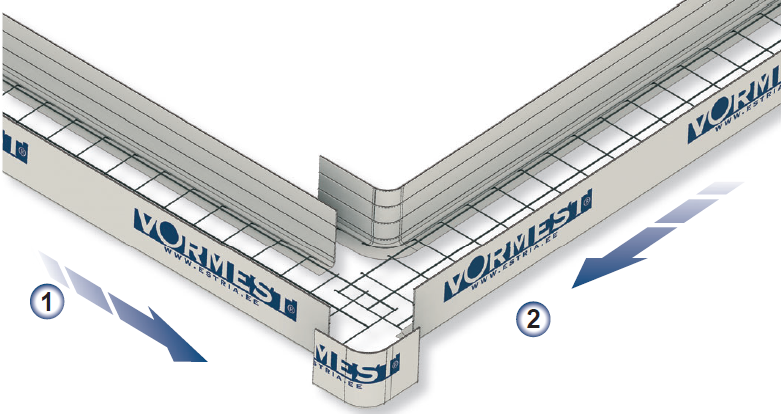
- Place the sole molds on the marked axes to see the necessary cuts and bends
- cut and bend according to the drawing (pay attention to the cross-reinforcement cut point)
- place sole mold 1 on top of sole mold 2
- place the cut piece under the outside corner so that the "hooks" of the cross reinforcement are under the sole mold
Jätkuühendus
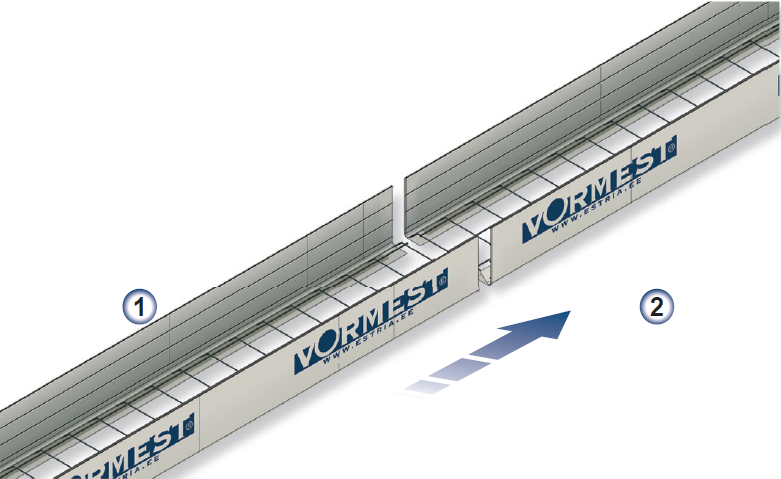
- On sole form 2, cut the first two cross braces in the middle
- place sole mold 1 inside sole mold 2 with an overlap of 320-400 mm
- press in all the way
T-ühendus
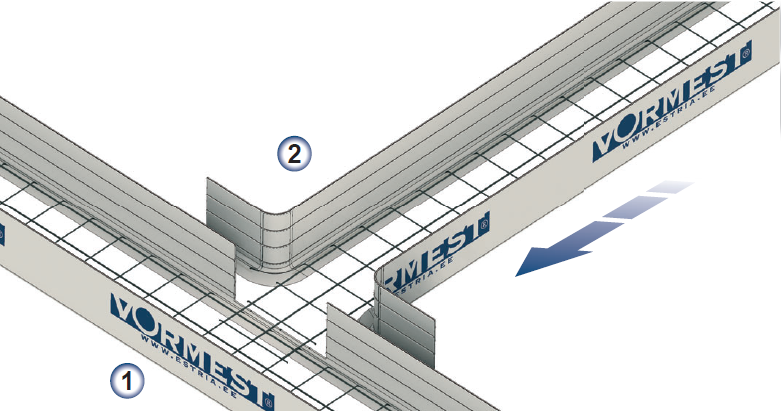
- Place the sole molds on the marked axes to see the necessary cuts and bends
- cut and bend according to the drawing
- place sole mold 2 under sole mold 1
Postitaldmik
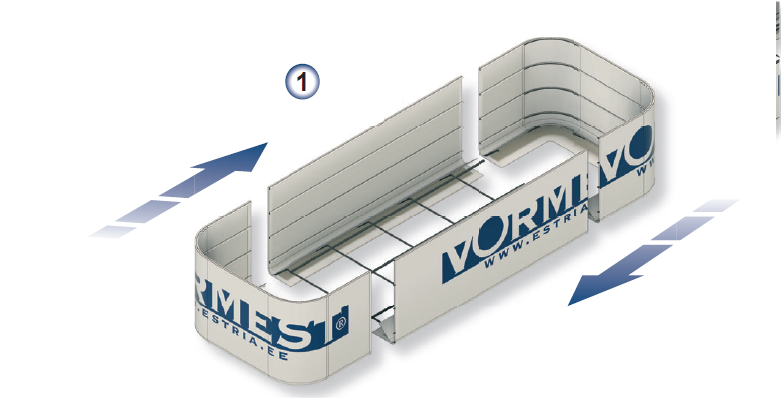
- Cut a piece to the required length
- in addition, cut a piece longer than the width of the sole mold by at least 500 mm to make the ends
- make the ends as shown in the figure
- place them under the sole mold
Erinevatel tasapindadel vormi ühendamine
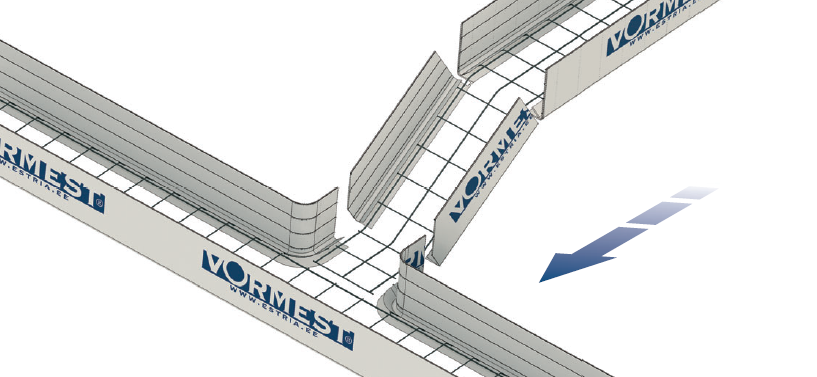
- Place the forms in place
- prepare the T-connection
- cut through the sidewalls of the higher or lower placed form at the bend
- if necessary, cover the triangular openings on the inner surface of the mold with a piece of Formest
Taldmikuvormi küljesidemed
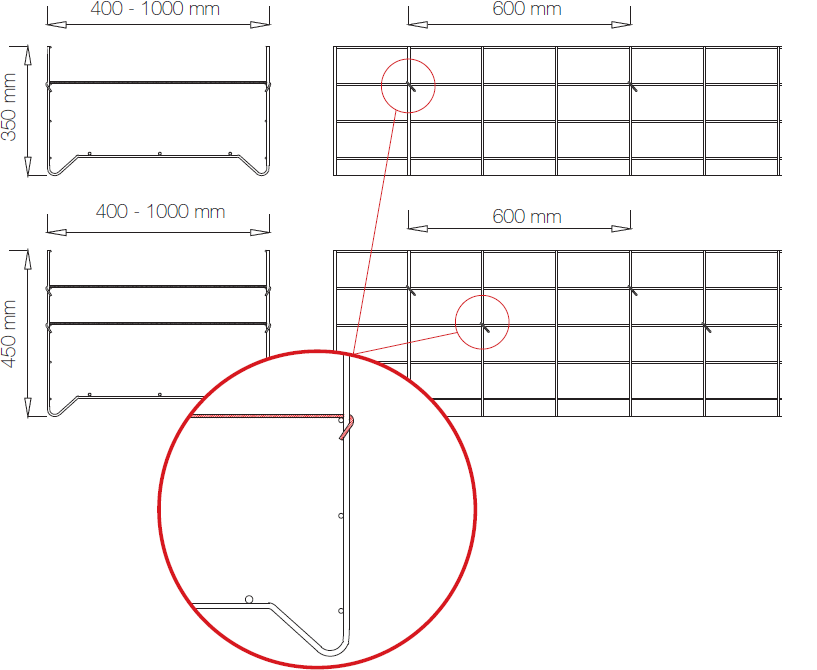
- Cut a piece to the required length
- in addition, cut a piece longer than the width of the sole mold by at least 500 mm to make the ends
- make the ends as shown in the figure
- place them under the sole mold
